Granny square is a patten loved by many of those who like to crochet. This simple motif is easy to memorize and it could be worked with any type of yarn. Crochet granny squares could be used nearly for any project, from a crochet blanket to a skirt, from potholders to a crochet toy.
Usually granny square motif is small, about 4-6 rows. It's fast to work and is perfect for using any leftover yarn. But what can you do in case you need a bigger square? How about making a blanket out of a single granny square?
Of course you can follow the all-known pattern and add more rows. Would it be so inspiring or you'll get bored? May be this is the point where you can try to become a designer yourself and create your own granny square variation?
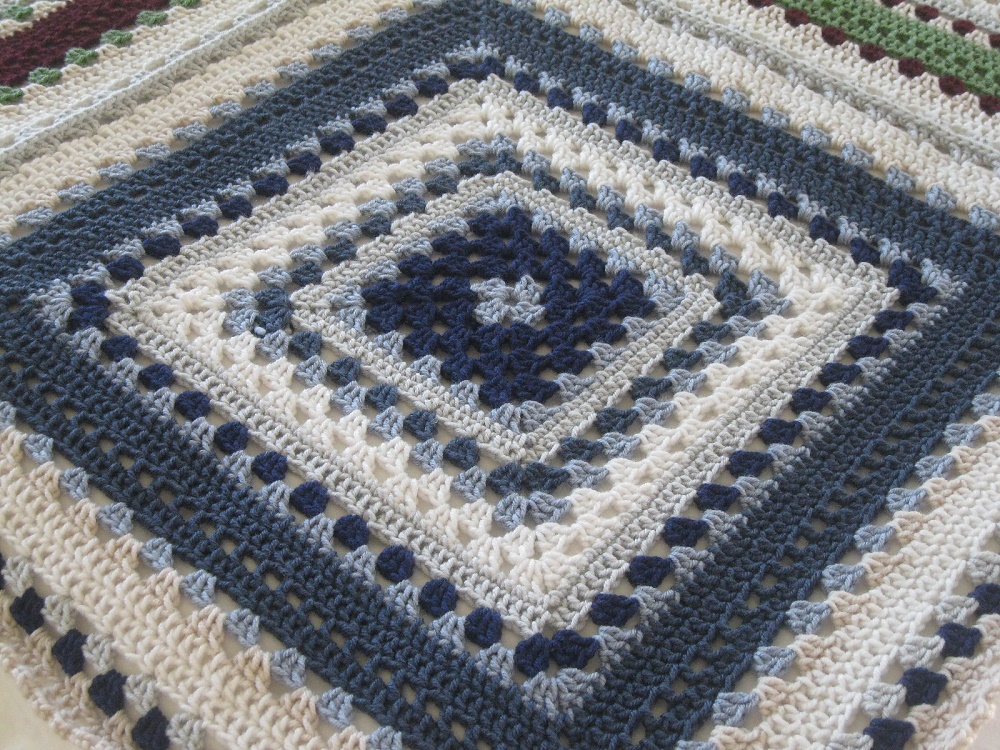
Гигантский бабушкин квадратИсточник: Дарья Насибулина для Креаликум
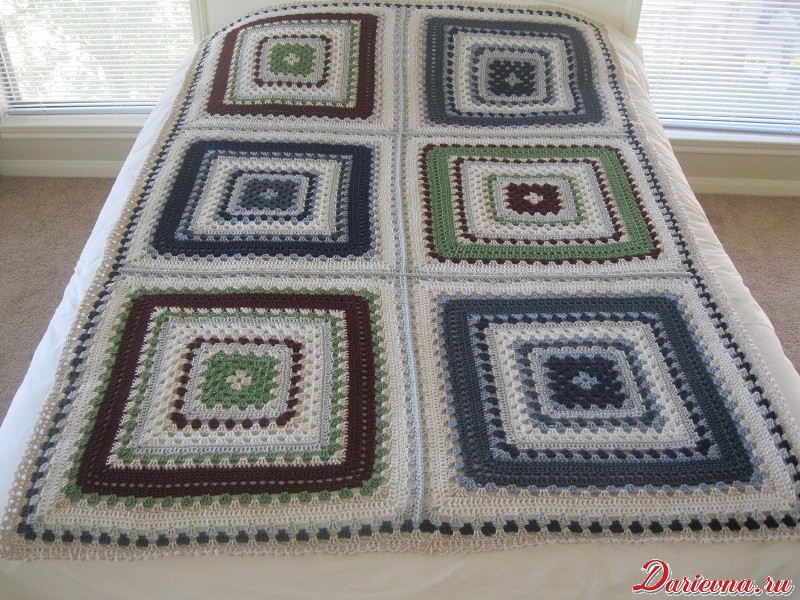
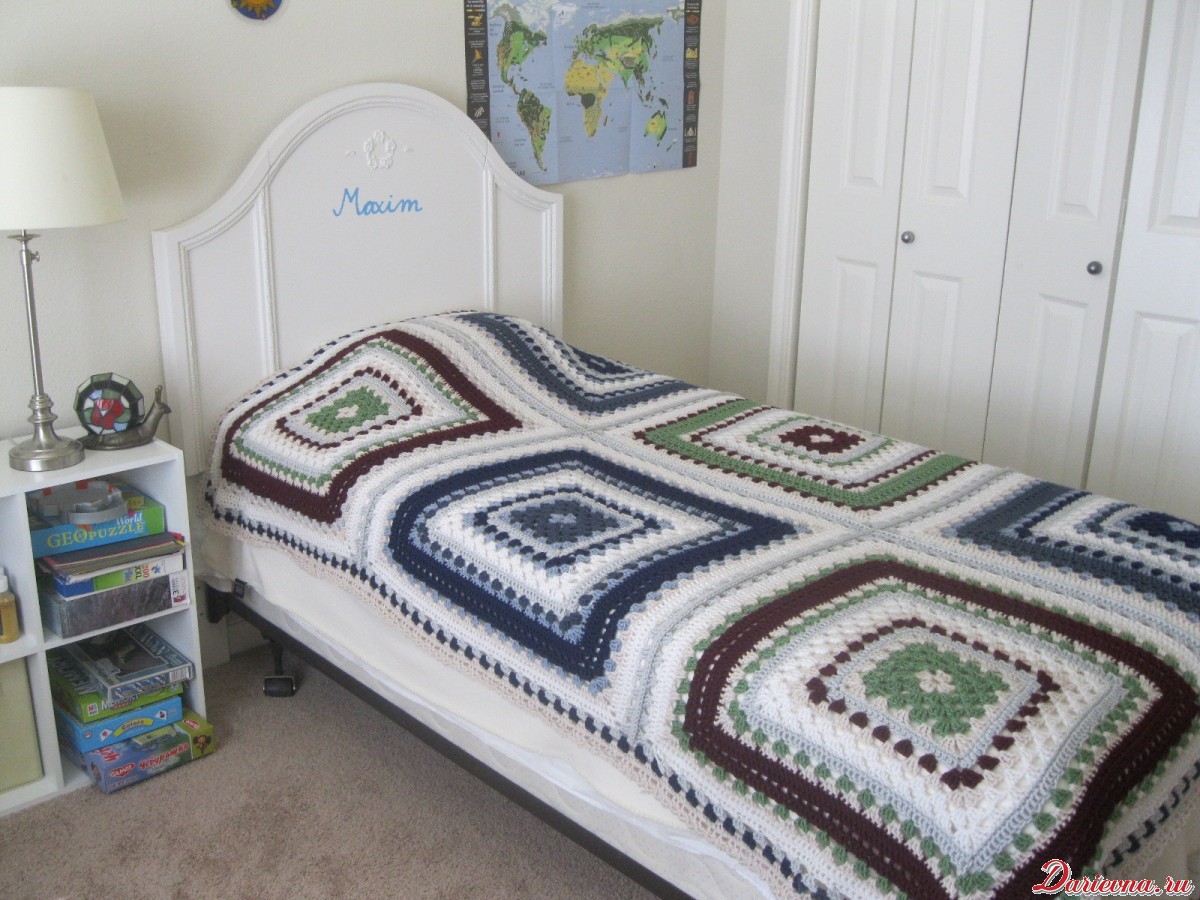
This is what happened to me in March 2012, when I decided to make a nice bedcover for my son's twin bed. I was not too excited to crochet many small squares, but large squares seemed to be much more attractive.
I was also planning to use a simple pattern easy to memorize, without a need to constantly checking up the chart. The other question was to find a pattern that wouldn't be too monotonous, repeating the same series of stitches, this is also boring.
As a result, I selected a traditional granny square pattern, but created my own version of this famous motif — «Giant Granny Square» (this is a link to Ravelry page of the design). The chart and instructions were specifically made for the Darievna.ru (in 2023 it became a part of Krealikum.ru) and were also published on Ravelry in April 2012. A bit later I also made an instruction for the twin bed blanket that consisted of 6 giant granny squares.
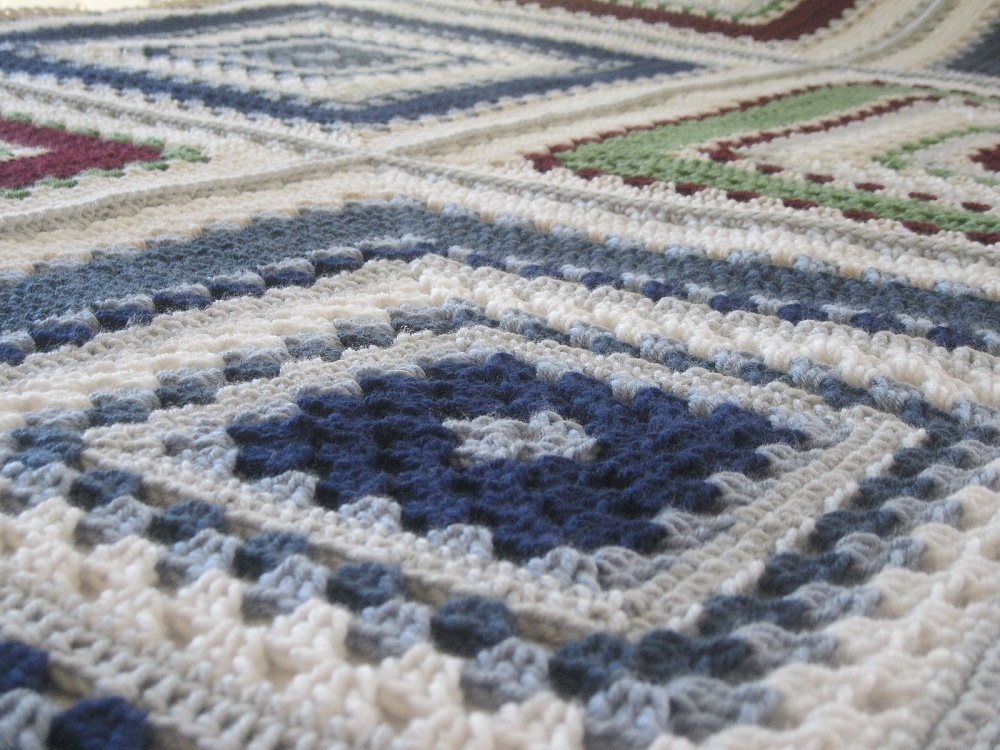
Покрывало из гигантских бабушкиных квадратовИсточник: Дарья Насибулина для Креаликум
Giant granny square. Written instruction and chart
I'm very happy that many crocheters liked my giant granny square pattern. There are more than 80 projects on Ravelry. This is a real inspiration for me! So I decided to update this free pattern and make a written instruction that would help with questions while working the chart.
Granny square size: approx. 24'' (61 cm)
Hook size: 5,5 mm (I)
Yarn: 100% Acrylic, 355 yards (198 gr)
Color scheme #1: one skein of beige, maroon, light gray, green and white
Color scheme #2: one skein of light blue, dark blue, light gray, medium blue and white
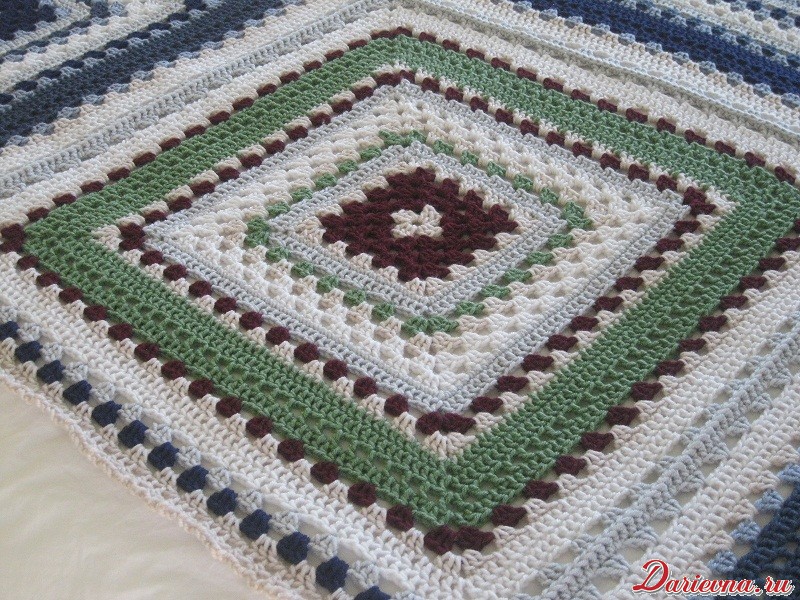
Giant granny square written instruction
Yarn color #1: beige or light blue
Yarn color #2: maroon or dark blue
Yarn color #3: gray
Yarn color #4: green or medium blue
Yarn color #5: white
With yarn color #1 start with magic loop (sliding loop) or ch6 then slip st to the first ch to form a ring.
Row 1: ch3 (counts as dc), 2 dc in the ring, (*) ch2, 3 dc in the ring; repeat from (*) two more times, ch2, slip st to top of ch3 (= 12 dc and 4 ch2). Cut yarn.
Row 2: with yarn color #2 slip st in any ch2 of Row 1, ch3 (counts as dc), (2 dc, ch2, 3 dc) in the same ch2 of Row 1, (*) ch1, (3 dc, ch2, 3 dc) in the next ch2 of Row 1; repeat from (*) two more times, join with sc to top of ch3.
Row 3: ch3 (counts as dc), 2 dc in the same space, (*) ch1, (3 dc, ch2, 3 dc) in corner ch2 of Row 2, ch1, 3 dc in ch1 of Row 2; repeat from (*) three more times, ch1, join with sc to top of ch3.
Row 4: ch3 (counts as dc), 2 dc in the same space, (*) ch1, 3 dc, ch1, (3dc, ch2, 3dc) in corner ch2 of Row 3, ch1, 3dc in ch1 of Row3; repeat from (*) three more times, ch1, join with slip st to top of ch3. Cut yarn.
Row 5: with yarn color #1 slip st in any corner ch2, ch3 (counts as dc), (2 dc, ch2, 3 dc) in the same space, (*) ch1, 3 dc in ch1 of Row4, ch1, 3 dc in ch1 of Row4, ch1, 3 dc in ch1 of Row4, ch1, (3dc, ch2, 3dc) in corner ch2 of Row 4; repeat from (*) two more times, ch1, 3 dc in ch1 of Row4, ch1, 3 dc in ch1 of Row4, ch1, ch1, 3 dc in ch1 of Row4, join with slip st to top of ch3. Cut yarn.
Row 6: with yarn color #3 slip st in any corner ch2, ch1 (doesn’t count as sc), (*) (1 sc, ch2, 1 sc) in the same space, 1 sc in every dc and ch1 of Row 5; repeat from (*) 3 more times, ending with 1sc in every dc and ch1 of Row 5, join with slip st to top of first sc of the row. (= 84 sc and 4 ch2).
Row 7: ch3 (counts as dc), (*) (1 dc, ch2, 1 dc) on the corner ch2 of Row 6, 1 dc in every sc of Row 6; repeat from (*) 3 more times, ending with 1 dc in every sc of Row 6, join with slip st to top of ch3. Cut yarn. (= 92 dc and 4 ch2).
Row 8: with yarn color #4 slip st in any corner ch2, ch3 (counts as dc), (2 dc, ch2, 3 dc) in the same space, (*) ch1, (skip 3 dc of Row 7, 3dc in 4th dc, ch1) x 5 times, ch1, (3dc, ch2, 3dc) in corner ch2 of Row 7; repeat from (*) two more times, ch1, (skip 3 dc of Row 7, 3dc in 4th dc, ch1) x 5 times, ch1, join with slip st to top of ch3. Cut yarn.
Row 9: with yarn color #1 slip st in any corner ch2, ch3 (counts as dc), (2 dc, ch2, 3 dc) in the same space, (*) ch1, (skip 3 dc of Row 8, 3dc in ch1 of Row 8, ch1) x 6 times, ch1, (3dc, ch2, 3dc) in corner ch2 of Row 8; repeat from (*) two more times, ch1, (skip 3 dc of Row 8, 3dc in ch1 of Row 8, ch1) x 6 times, ch1, join with slip st to top of ch3. Cut yarn.
Row 10: with yarn color #5 slip st in any corner ch2, ch3 (counts as dc), (2 dc, ch2, 3 dc) in the same space, (*) ch1, (skip 3 dc of Row 9, 3dc in ch1 of Row 9, ch1) x 7 times, ch1, (3dc, ch2, 3dc) in corner ch2 of Row 9; repeat from (*) two more times, ch1, (skip 3 dc of Row 9, 3dc in ch1 of Row 9, ch1) x 7 times, ch1, join with slip st to top of ch3.
Row 11: slip st in 2 dc of Row 10, slip st in corner ch2, ch3 (counts as dc), (2 dc, ch2, 3 dc) in the same space, (*) ch1, (skip 3 dc of Row 10, 3dc in ch1 of Row 9, ch1) x 8 times, ch1, (3dc, ch2, 3dc) in corner ch2 of Row 10; repeat from (*) two more times, ch1, (skip 3 dc of Row 9, 3dc in ch1 of Row 9, ch1) x 8 times, ch1, join with slip st to top of ch3. Cut yarn.
Row 12: with yarn color #3 slip st in any corner ch2, ch1 (doesn’t count as sc), (*) (1 sc, ch2, 1 sc) in the same space, 1 sc in every dc and ch1 of Row 11; repeat from (*) 3 more times, ending with 1sc in every dc and ch1 of Row 11, join with slip st to top of first sc of the row. (= 164 sc and 4 ch2).
Row 13: ch3 (counts as dc), (*) (1 dc, ch2, 1 dc) on the corner ch2 of Row 12, 1 dc in every sc of Row 12; repeat from (*) 3 more times, ending with 1 dc in every sc of Row 12, join with slip st to top of ch3. Cut yarn. (= 172 dc and 4 ch2). Cut yarn.
Row 14: with yarn color #2 slip st in any corner ch2, ch3 (counts as dc), (2 dc, ch2, 3 dc) in the same space, (*) ch1, (skip 3 dc of Row 13, 3dc in ch1 of Row 13, ch1) x 10 times, ch1, (3dc, ch2, 3dc) in corner ch2 of Row 13; repeat from (*) two more times, ch1, (skip 3 dc of Row 13, 3dc in ch1 of Row 13, ch1) x 10 times, ch1, join with slip st to top of ch3. Cut yarn.
Row 15: with yarn color #1 slip st in any corner ch2, ch3 (counts as dc), (2 dc, ch2, 3 dc) in the same space, (*) ch1, (skip 3 dc of Row 14, 3dc in ch1 of Row 14, ch1) x 11 times, ch1, (3dc, ch2, 3dc) in corner ch2 of Row 14; repeat from (*) two more times, ch1, (skip 3 dc of Row 14, 3dc in ch1 of Row 14, ch1) x 11 times, ch1, join with slip st to top of ch3. Cut yarn.
Row 16: with yarn color #4 slip st in any corner ch2, ch1 (counts as sc), ch2, 1 sc in the same space, 1 sc in every dc and ch1 of Row 15, (*) (1 sc, ch2, 1 sc) in the same space, 1 sc in every dc and ch1 of Row 15; repeat from (*) 2 more times, ending with 1sc in every dc and ch1 of Row 15, join with slip st to top of first sc of the row. (= 212 sc and 4 ch2).
Row 17: ch3 (counts as dc), (*) (1 dc, ch2, 1 dc) on the corner ch2 of Row 16, 1 sc in every dc of Row 16; repeat from (*) 3 more times, ending with 1 dc in every sc of Row 16, join with slip st to top of ch3. (= 220 dc and 4 ch2).
Row 18: ch3 (counts as dc), ch1, (*) (1 dc, ch2, 1 dc) on the corner ch2 of Row 17, (ch1, skip 1dc of Row 17, 1 dc ) x 27 times, ch1; repeat from (*) 3 more times, ending with (skip 1dc of Row 17, 1 dc ) x 26 times, ch1, join with slip st to top of ch3.
Row 19: ch3 (counts as dc), 2 dc, (*) (1 dc, ch2, 1 dc) on the corner ch2 of Row 18, 1 dc in every dc and ch1 of Row 18; repeat from (*) 3 more times, ending with 1 dc in every dc and ch1 of Row 18, join with slip st to top of ch3. (= dc and 4 ch2). Cut yarn.
Row 20: with yarn color #2 slip st in any corner ch2, ch3 (counts as dc), (2 dc, ch2, 3 dc) in the same space, (*) ch1, (skip 3 dc of Row 19, 3dc in ch1 of Row 19, ch1) x 14 times, ch1, (3dc, ch2, 3dc) in corner ch2 of Row 19; repeat from (*) two more times, ch1, (skip 3 dc of Row 19, 3dc in ch1 of Row 19, ch1) x 14 times, ch1, join with slip st to top of ch3. Cut yarn.
Row 21: with yarn color #1 slip st in any corner ch2, ch3 (counts as dc), (2 dc, ch2, 3 dc) in the same space, (*) ch1, (skip 3 dc of Row 20, 3dc in ch1 of Row 20, ch1) x 15 times, ch1, (3dc, ch2, 3dc) in corner ch2 of Row 20; repeat from (*) two more times, ch1, (skip 3 dc of Row 20, 3dc in ch1 of Row 20, ch1) x 15 times, ch1, join with slip st to top of ch3. Cut yarn.
Row 22: with yarn color #5 slip st in any corner ch2, ch3 (counts as sc), ch2, 1 dc in the same space, 1 dc in every dc and ch1 of Row 21, (*) (1 dc, ch2, 1 dc) in the same space, 1 dc in every dc and ch1 of Row 21; repeat from (*) 2 more times, ending with 1dc in every dc and ch1 of Row 15, join with slip st to top of first sc of the row. (= 276 dc and 4 ch2).
Row 23: ch3 (counts as dc), (*) (1 dc, ch2, 1 dc) on the corner ch2 of Row 22, 1 dc in every dc of Row 22; repeat from (*) 3 more times, ending with 1 dc in every dc of Row 22, join with slip st to top of ch3. (= 284 dc and 4 ch2).
Stop on Row 23 if you want to finish giant granny square and make just 1 granny.
Work Row 24 just in case you want to make a blanket and need several grannies. Use yarn color #3 and follow instructions for Row 20 (you'll have to make extra 3dc, ch1 while working the side of the square).
If you are following the written instruction and want to make the square bigger, skip Row 24 and repeat pattern from Row 8 to Row 19 as many times as you need, finish with Row 20, 21, 22 and 23.
Giant granny square free chart
Click to see pattern chart in full size.
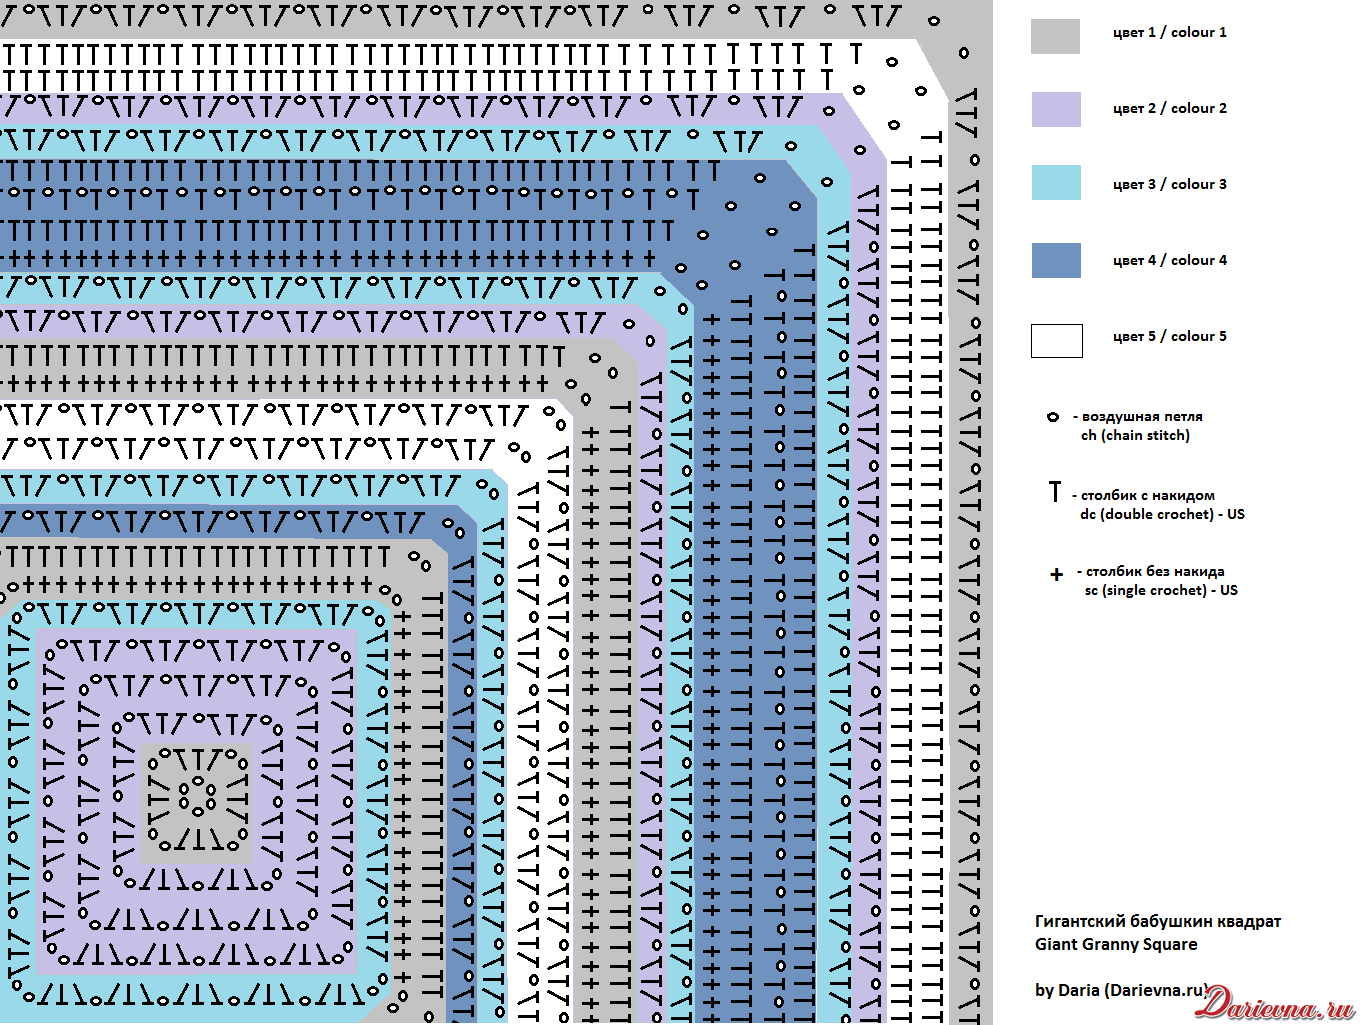
Work Row 24 just in case you want to make a blanket and need several grannies.
To make the square bigger skip Row 24 and repeat pattern from Row 8 to Row 19 and many times as you need and finish with Rows 20, 21, 22 and 23.
To make a throw or blanket approx. 145 cm x 205 cm you will need 6 full squares. Here is a blanket I made myself for my son's twin bed:
How to crochet giant granny square bedcover?
After I comleted all 6 giant granny squares, I was finally able to create a free pattern for a bedcover. You can find instructions on the page «Giant granny square bedspread free pattern».
Color scheme for the bedcover is a bit different from a square pattern on this page, please take attention.
I would like to thank all crocheters who liked my bedcover pattern, at this point we have ![]() ready!
ready!
Good luck with your project!


